Writeup - Do Re Mi (UIUCTF 2025)
UIUCTF 2025 - Do Re Mi Writeup
Description
1 | The musl allocator was too slow, so we went to a company known for 🚀 Blazing Fast 🚀 |
Writeup
This was a pretty cool pwn challenge that involved heap exploitation on an x86_64 binary using musl’s libc and Microsoft’s mimalloc allocator.
Introduction
The provided handout.tar.gz file included a Dockerfile, chal binary, chal.c source code, and compiled libmimalloc.so.2.2 library. The Dockerfile included the lines:
1 | # ... |
We can see mimalloc v2.2.4 was compiled from source using the default options, and was used as the allocator for the challenge using the LD_PRELOAD hook. We can also see that the chroot environment for the hosted problem uses Alpina with musl libc and bash installed (we’ll cover its importance later).
The C source code was pretty simple and a common CTF-style challenge, “heap notes”. It gives you the ability to allocate up to 16 notes (chunks of size 128), free arbitrary notes, read from the notes, and write to the notes. While the chunk/read/write size was restricted to 128 bytes, the pointer to notes were not set to NULL after freeing, leading to easy UAF read/write and double free.
1 | void create() { |
Mimalloc
Mimalloc is a heap implementation created by Microsoft, designed to be small and fast. It’s open source and can be viewed on GitHub, plus I also used the obligatory Chinese blogpost to learn more about the internal workings. It has a secure mode than can be enabled during compilation using the -DMI_SECURE=ON flag. Secure mode provides:
- Guard pages
- Encoded free list pointers
- Double free detection
- Random allocation order
- And more
However, secure mode was not set for this challenge and thus none of the mitigations were enabled. Also, since we’re not using the glibc ptmalloc2 implementation, all those mitigations like safe linking/unlinking don’t exist here (making exploitation a lot easier).
Some other major differences between mimalloc and ptmalloc2 is:
- Mimalloc doesn’t have inline metadata (like ptmalloc2’s 0x10-byte header with information like chunk size)
- A page is allocated for each chunk size
- Whenever the first chunk of a given size is allocated, an entire page is set aside and split up into chunks of that same size.
- As an example, when the first chunk of size 128 (0x80) bytes is allocated, a page is split into 32 chunks of that size and the first one is returned.
- Since pages are pre-split into chunks, all remaining chunks are immediately placed into the free list.
- Going along with 128-byte chunks, when the first one is allocated (and returned to the user), the remaining 31 chunks are then immediately placed into the free list (even though they’ve never been allocated chunks before).
- If a chunk is freed, it goes to a “local free list” instead of the “free list”. Allocated chunks are pulled from the free list before the local free list.
- For exploitation purposes, that means if an attacker frees a chunk and then allocates a chunk of the same size, they may not get the same one back if there’s chunks in the regular free list.
- When debugging a binary using GDB, using a command like
info proc mappingsorvmmapwill show memory segments. The heap chunks allocated for this challenge were placed in a new, separate RW mapping, not in the normal[heap]mapping you’d see.- This also means any debugger-specific commands like
heap chunkswon’t work here, all inspection has to be done manually.
- This also means any debugger-specific commands like
- Actual chunk contents are placed in the heap memory segment starting 0x10000 bytes after the beginning.
- As an example, if the mimalloc memory segment started at address 0x286e8000000, the first chunk would be allocated at 0x286e8010000.

I’m sure there’s a lot of other internal particularities or complexities that I’m skipping or generalizing, but with our fixed size chunks and lack of security mitigations, this is really all I needed to know to exploit it.
Exploitation
Just like ptmalloc2, the first 8 bytes in a freed chunk contain a pointer to the next chunk in the free list, allowing for easy heap leaks and fake chunks. As with any heap challenge, the first step is to get leaks for data sections outside of the heap to use gadgets/data/etc. to get RCE.
In ptmalloc2, there are no non-heap pointers in the heap unless there are chunks in the small bins, large bins, or unsorted bin. Luckily for us, mimalloc has a number of pointers outside of the heap from the getgo.

Using pwndbg’s p2p command, we were able to locate pointers inside of the heap and identify a few that went to the libmimalloc.so.2.2 (or surrounding) memory segments, notably at offsets 0x28, 0x118, and 0x1c0. It’s important to note that Linux x86_64 ASLR doesn’t separate different library segments; this means that if you get a leaked address into one library file, the other library files start at a predictable offset. Therefore, by leaking a libmimalloc address, we can also recover the libc base address.
I created some helper functions to simplify chunk interactions:
1 |
|
To get around the “free list” vs “local free list” shenanigans, I allocated 32 chunks at the start (saving 6 of them in the notes, letting the rest get lost in the void) to empty the “free list”. I then freed two of the chunks and read the contents of the second one to leak a heap address and recover the heap base address.
1 | p.recvuntil(b'YAHNC> ') |
Then, to recover a library leak, I used my Use After Free write to modify the pointer to the second freed chunk to be at heap_base + 0x1b8. This way, I could allocate two more chunks, and the second one would be our fake chunk at address 0x1b8. Reading from this chunk would give me the libmimalloc address I identified earlier. Note that I chose the offset 0x1b8 instead of 0x1c0 because 0x1b8 was NULL, and I wanted to make sure that the free list thought it was empty again and not try to treat the address at 0x1c0 as a “next pointer”.
1 | payload = flat( |
You’ll also notice I put a '/bin/bash\x00' string inside the padding - this was used later.
At this point, I needed to decide what my RCE vector was going to be. In normal glibc ptmalloc2, techniques like FSOP, __malloc_hook, or libc GOT overwrites are common. However, all loaded ELFs had full RELRO, and since we’re using musl, techniques like FSOP or writable hooks would require investigation. I therefore decided to leak a stack address and write my own ROP chain onto the stack, using gadgets from libc.
Using the p2p command again, I found that the musl libc had a pointer to the stack at a predictable offset.

By creating another fake chunk (through UAF write) near this address, I was able to leak the stack address (through an uninitialized read after reallocation). Note I again choose an address actually 0x18 bytes before the leak since it was NULL at that address and I didn’t want reallocation errors.
1 | free(7) |
The last step was to actually write a ROP chain to the stack that would give me RCE. I eventually decided on a ret2syscall approach that would call execve('/bin/bash', 0, 0) by setting each register then syscall. I chose this approach because the musl library was stripped and I couldn’t find the system() function. I also chose /bin/bash over /bin/sh because the container used BusyBox. BusyBox packages several commandline options into one single binary, and just symlinks those commands in /bin to the /bin/busybox executable. This executable would then identify args[0] to know which command the user ACTUALLY wanted to run.
However, exploit developers often just do execve('/bin/sh', 0, 0) since they don’t want to create structs for arguments and the environment. Unfortunately, with BusyBox, making that function call would cause the /bin/busybox executable to exit early since the lack of arguments caused it to not know which executable to really run. I believe this is why bash was installed in the target container (to make it simpler for us, although we easily could’ve done it). That is also why I included /bin/bash\x00 at a known address on the heap earlier.
The main() function of the target binary never returned (only exit()), so I decided to overwrite the return address for the read() function. Since our chunk size was 0x80 bytes, that meant we could write 0x80 bytes in a single go, more than enough for a simple ROP chain. Through GDB debugging, I determined that the offset from the stack leak to the read() return value was 0xe0 bytes on my machine. Since this address can change based on environmental variables, I decided to use a retsled (ROP version of nopsled) and include as many ret gadgets at the beginning as I could before my real ROP chain. This way, even if remote had more/less environmental variables (which it did), as long as the return value for read() was within the retsled, the real ROP chain would still be triggered just fine.
1 | payload = flat( |
Final Exploit
Here’s my final solve script:
1 | from pwn import * |
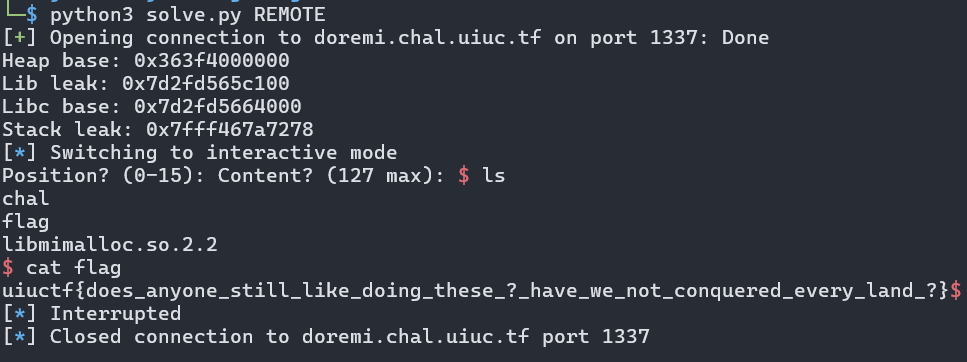
Flag: uiuctf{does_anyone_still_like_doing_these_?_have_we_not_conquered_every_land_?}